Guide · Assembly & Setup
Setting up the WEEKEND rooftop tent –
a step-by-step guide
The WEEKEND is fully assembled on the ground and only lifted onto the car as a complete unit. No tools, no second person needed. This guide walks you through the full setup – both directly on the roof bars and using the WEEKEND Bridge for maximum stability.
Preparation
What you need
Always required
Optional: With the Bridge
No tools required – the entire setup is tool-free.
Direct mount
Setup without the Bridge
This option works well when your roof bars are 75–85 cm apart and you are using flat, wide-profile crossbars.

Check and align your roof rack
Make sure your roof bars are firmly secured and your vehicle's roof load rating is sufficient. Align both bars parallel to each other.
Inflate the air platform
Lay the air platform flat on the ground and inflate it to 10 PSI using the included hand pump. The platform is ready when it feels firm and evenly rigid.

Set up the tent on the platform
Assemble the tent on the inflated air platform and fasten it with the buckles. Tent and platform now form one unit that is lifted onto the car together.

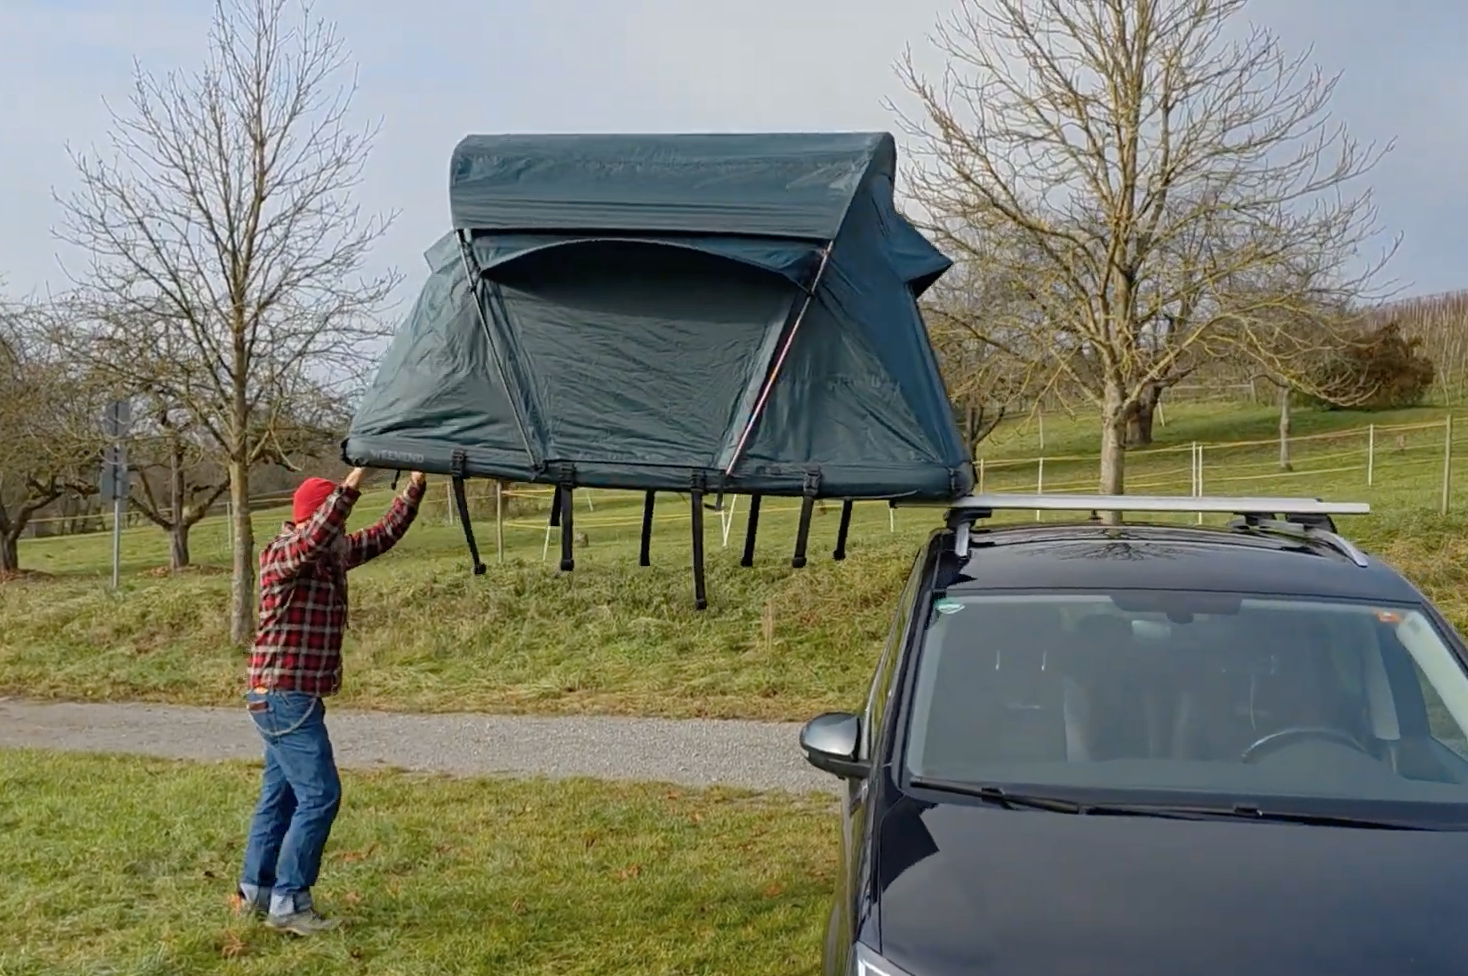
Lift the WEEKEND onto the car
Lift the fully assembled WEEKEND onto the roof bars. At 12 kg, this is easily done by one person.
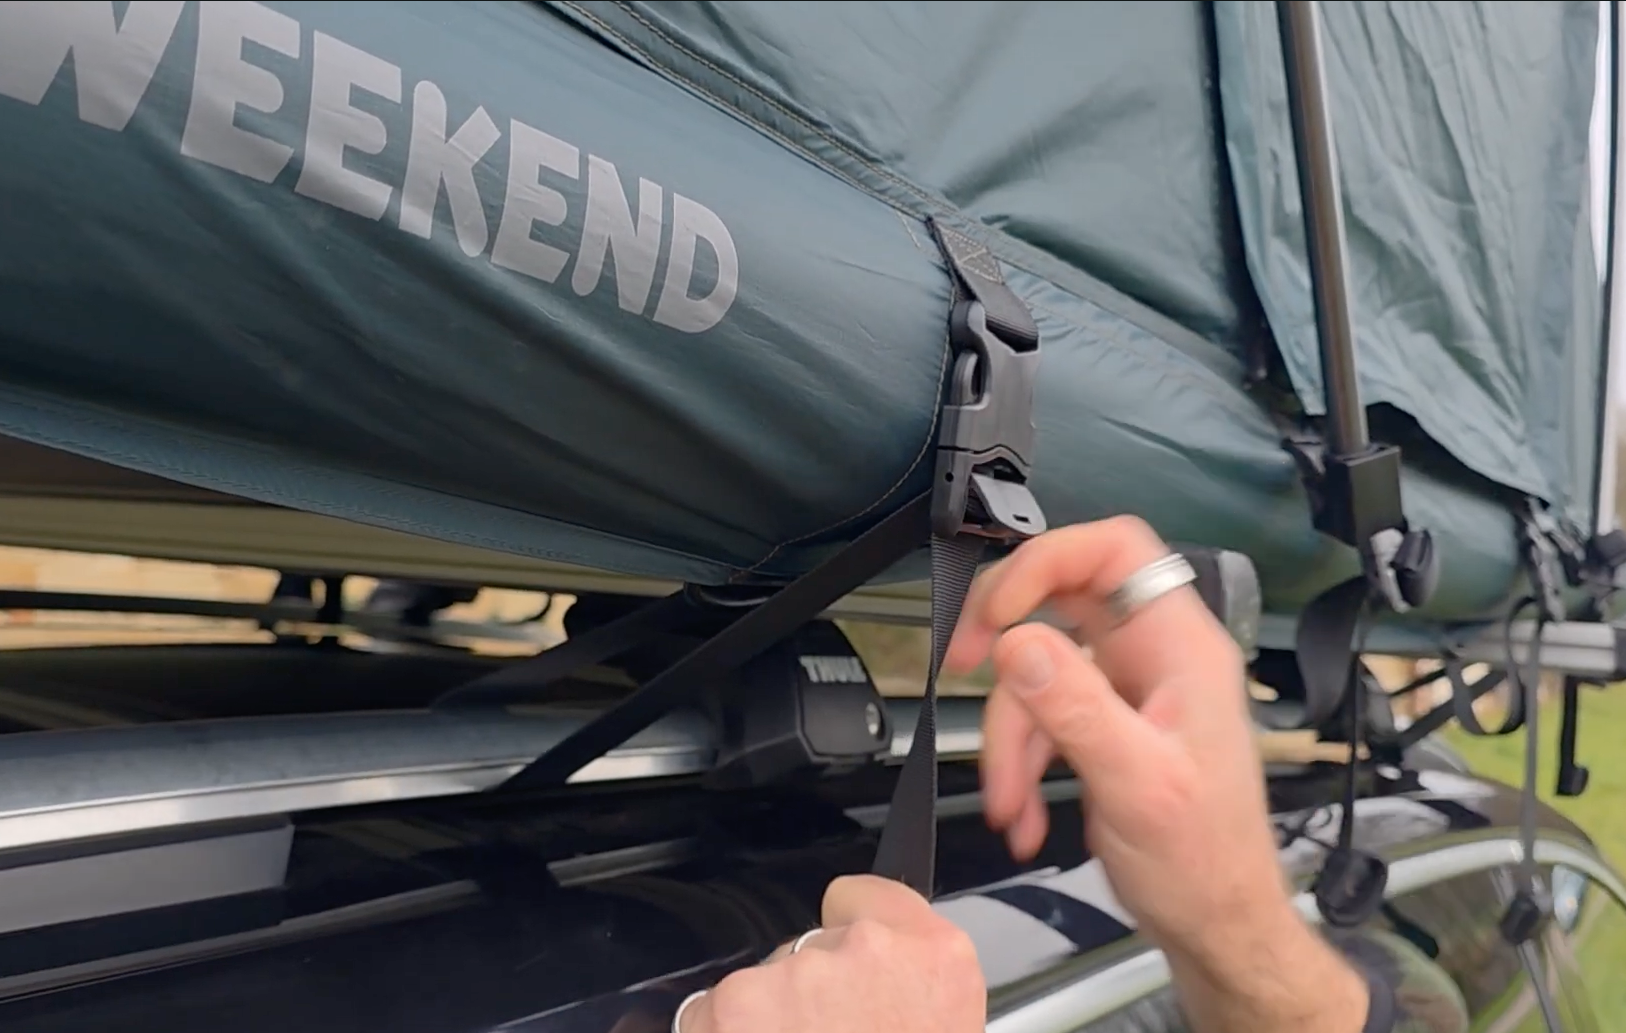
Secure with buckles and straps
Attach the air platform to the roof bars using the integrated buckles and tighten the straps. Check all connections for a secure fit.
Attach the ladder with straps
As the final step, attach the aluminium ladder to the air platform using the straps. The WEEKEND is now ready.

Recommended
Setup with the WEEKEND Bridge
The Bridge provides full, even support across the entire base – regardless of bar spacing or crossbar shape. We recommend it for anyone who wants maximum stability and sleeping comfort.

Roof rack & Bridge ready
Mount the roof bars and lay the Bridge across them.

Assemble WEEKEND on the ground
Inflate platform (10 PSI), set up tent – comfortably at ground level.

Lift onto car & secure
Lift the finished WEEKEND onto the Bridge, fasten, attach ladder.
Mount the roof rack and place the Bridge
Fit the roof bars firmly to the vehicle and lay the Bridge across them. The integrated aluminium beams distribute weight evenly.
Inflate the air platform
Lay the air platform flat on the ground and inflate it to 10 PSI. The Bridge is already waiting on the roof.
Set up the tent on the platform
Assemble the tent on the inflated air platform and secure it with the buckles – all at comfortable ground level.
Lift the WEEKEND onto the Bridge
Lift the fully assembled WEEKEND onto the Bridge. At 12 kg, one person can manage this comfortably.
Secure with buckles and straps
Attach the air platform to the roof bars using the integrated buckles and tighten all straps. Check every connection for a secure fit.
Attach the ladder with straps
As the final step, attach the aluminium ladder to the air platform using the straps. The WEEKEND is up – stable, flat, ready for the night.
Decision guide
With or without the Bridge – what is right for you?
Without Bridge
Recommended
With Bridge
Good to know
Tips for safe use
Check your roof load rating
Check the static roof load rating of your vehicle (see your owner's manual). The WEEKEND weighs 12 kg – plus 1.8 kg for the Bridge.
Check all fixings
Before each use, check all buckles and straps are firmly secured. The WEEKEND is not transported on the roof while driving.
Store dry
When leaving the WEEKEND at home, make sure it is completely dry before storing. The Bridge can be rolled up and stored inside the tent.
Check air pressure
In cold temperatures, the air pressure in the platform may drop slightly. A quick top-up before sleeping ensures optimal comfort.
Still have questions about setup?
Our team is happy to help – by email or in a personal conversation. If you are unsure whether the Bridge suits your vehicle, just send us your car model and bar spacing.
Get in touch